Introduction
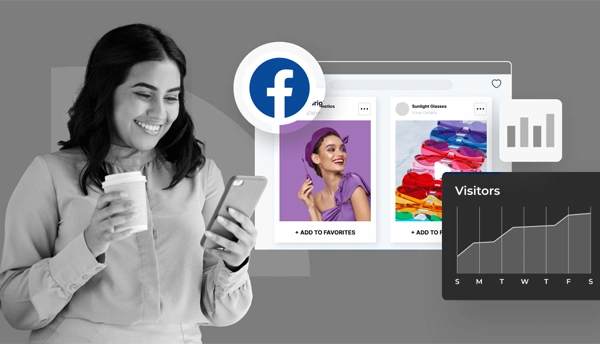
Welcome to the world of Facebook Ads! If you have ever wondered how businesses magically show their products to just the right people online, the secret is Facebook advertising. With over two billion active users, Facebook is like a giant marketplace where you can showcase your business to the exact audience you want.
But wait—before your eyes glaze over at words like campaign, ad set, or Meta Pixel, breathe. This guide is made for absolute beginners. We will turn confusing jargon into simple, actionable steps—and maybe even have a little fun along the way. By the end, you’ll confidently launch your first Facebook ad and start seeing real results.
Step 1: Prep Your Digital Toolkit
Before you jump in, make sure you have your essentials:
- A Facebook profile
- A Facebook Page for your business
- Optional but recommended: An Instagram account linked to your Page
- A Meta Business Suite account (formerly Business Manager)
- A payment method (card, UPI, or other)
Pro Tip: Go to business.facebook.com → All tools → Ads Manager. If it opens without errors, congratulations—you are officially ready!
Step 2: Create Your Meta Business Manager & Ad Account
- Log in at business.facebook.com.
- Navigate to Settings → Accounts → Ad Accounts and create a shiny new ad account.
- Pick your country, currency, and time zone carefully, these are basically set in stone!
- Go to Settings → Payments & add your payment method.
Fun tip: Treat this like setting up your first online game account—get your stats right or the game might misbehave!
Step 3: Connect Your Assets
- Add your Facebook Page in Settings → Accounts → Pages.
- Access Settings, then Accounts → Instagram Accounts, to connect your Instagram profile.
Voilà! Your accounts are now linked like peanut butter and jelly.
Step 4: Set Up Meta Pixel Tracking
Meta Pixel is like a tiny detective on your website. It tracks who visits, clicks, or fills forms so Facebook can show ads to people most likely to convert.
Quick setup:
- Go to Events Manager → Connect Data Sources → Web → Meta Pixel
- Pick your website platform (Shopify, WordPress, etc.) for easy setup
- Turn on Conversions API if your platform supports it
- Verify events like PageView or Lead
No website? No worries—you can still run Lead Ads with built-in Facebook forms.
Step 5: Understand the Facebook Ads Structure
Think of Facebook Ads like a sandwich:
- Campaign = The goal (Leads, Sales, Traffic)
- Ad Set = The audience, budget, and placement layers
- Ad = The juicy creative (includes images, videos, text & CTA)
Step 6: Create Your First Campaign
- Click Create in Ads Manager
- Pick your objective: Leads, Sales, Engagement, Traffic, or Awareness
- Name your campaign clearly (e.g., 2025-08 | Leads | Mumbai | Offer)
Tip: Naming your campaign properly helps you avoid crying over messy reports later.
Step 7: Define Audience, Budget, and Placements
- Audience: Start broad; you can get fancy later
- Location: Target cities or regions your customers are in
- Placements: Use Advantage+ Placements for automatic optimization, lets Facebook work its magic!
- Budget: Begin small—₹500–₹1,000/day is enough to start
Step 8: Create Your Ad Creative
Your ad is the star of the show. Keep it simple, mobile-friendly, and fun.
- Hook: Grab attention
- Value: Explain the benefit
- Proof: Add a testimonial or result
- CTA: “Sign Up,” “Get Offer,” or “Learn More”
Pro Tip: One promise per ad. Multiple offers = confused audience = fewer clicks.
Step 9: Use High-Quality Instant Forms (Optional)
If using Lead Ads:
- Keep forms short (Name, Phone, Email)
- Add a friendly thank-you screen: “We’ll call within 24 hours!”
Step 10: Publish and Monitor
Before hitting publish:
- Check links and spelling
- Ensure Pixel and events are working
- Confirm budget and targeting
After launch:
- Let it run 2–3 days before editing—Facebook needs time to “learn”
- Monitor CPC (Cost Per Click), CTR (Click-Through Rate), and Cost Per Lead
Step 11: Test, Tweak, and Improve
- Start with 2–3 ad sets targeting different audiences
- Try multiple creatives including images, videos, and headlines
- Pause underperformers and scale winners
Step 12: Common Beginner Mistakes
- Choosing the wrong campaign objective
- Making too many changes too quickly
- Over-targeting with too many filters
- Ignoring Facebook’s ad policies
Remember: Patience is your best friend here. Ads are like plants—give them water, sunlight, and time to grow.
Quick SEO-Friendly Checklist
- Create Meta Business Suite account & Ad Account
- Connect Facebook Page and Instagram
- Set up Meta Pixel and Conversions API
- Pick campaign objective and type
- Define audience, keywords, and placements
- Don’t miss to build 2 or 3 ads per ad set
- Set budget and schedule
- Monitor 72 hours, optimize weekly
For more tips and troubleshooting, you can always refer to the Facebook Ads Help Center
Conclusion
Facebook Ads do not have to be scary. With this fun, step-by-step guide, even beginners can run campaigns that actually work. Start small, track results, test different creatives, and let Facebook’s algorithm do its magic.
Follow these steps consistently, and Facebook Ads will become your trusty sidekick for lead generation, sales, and brand growth. Ready to launch your first campaign? Grab your coffee, fire up Ads Manager, and let’s make some ads that shine!


0 Comments